前面已经把 GitLab 和 SonarQube 都部署到了 Kubernetes 里:
GitLab     https://gitlab.jihw.top
SonarQube  https://sonarqube.jihw.top
Ingress    192.168.3.230
这篇记录两者配合使用的流程:代码放在 GitLab,流水线由 GitLab Runner 执行,扫描结果上传到 SonarQube。
本文用这个前端项目作为检测示例:
D:\workspace\jihw\qianduoduo\frontend
它是一个 Vite + Vue 项目,关键文件是:
package.json
package-lock.json
vite.config.js
src/
当前 package.json 里已有:
{
  "scripts": {
    "build": "vite build",
    "dev": "vite --host 0.0.0.0"
  }
}
所以 CI 里可以先执行 npm ci 和 npm run build,确认前端至少能正常构建,然后再执行 SonarQube 扫描。
整体流程
1. GitLab 创建项目
2. 把 frontend 代码推到 GitLab
3. SonarQube 创建项目并生成 Token
4. GitLab 项目配置 CI/CD Variables
5. 提交 sonar-project.properties
6. 提交 .gitlab-ci.yml
7. GitLab Runner 执行流水线
8. SonarQube 查看质量报告
确认 GitLab Runner
GitLab 本身只负责管理流水线,真正执行 job 的是 Runner。
先在 GitLab 页面确认 Runner:
Admin Area -> CI/CD -> Runners
或者进入具体项目:
Project -> Settings -> CI/CD -> Runners

如果没有 Runner,先安装一个 Kubernetes Runner。示例:
helm repo add gitlab https://charts.gitlab.io/
helm repo update

helm upgrade --install gitlab-runner gitlab/gitlab-runner \
  -n gitlab \
  --set gitlabUrl=https://gitlab.jihw.top \
  --set runnerToken='你的 Runner Token' \
  --set rbac.create=true
这里使用 Kubernetes executor,所以建议一开始就打开 rbac.create=true。否则 Runner 虽然能注册成功,也能从 GitLab 接到 job,但真正执行时可能会因为 ServiceAccount 权限不足而失败。
典型错误如下:
secrets is forbidden:
User "system:serviceaccount:gitlab:default" cannot create resource "secrets"
如果已经安装过 Runner,可以用下面的方式补上 RBAC:
helm upgrade gitlab-runner gitlab/gitlab-runner \
  -n gitlab \
  --reuse-values \
  --set rbac.create=true
还要注意 Runner 的标签。比如创建 Runner 时给它设置了 qianduoduo-frontend 标签,而 .gitlab-ci.yml 里的 job 没写 tags,默认情况下这个 Runner 不一定会接未打标签的 job。
有两种处理方式。
方式一是在 GitLab 页面允许 Runner 执行未打标签的 job:
Project -> Settings -> CI/CD -> Runners -> 编辑 Runner
勾选 Run untagged jobs
方式二是在 .gitlab-ci.yml 里给 job 明确加上标签:
build:
  stage: build
  tags:
    - qianduoduo-frontend

sonarqube:
  stage: scan
  tags:
    - qianduoduo-frontend
Runner 能访问 https://sonarqube.jihw.top 时,CI 里可以直接使用这个域名。
如果 DNS 没配好,也可以在 CI 变量里把 SonarQube 地址写成集群内 Service 地址。
常见两种写法:
SONAR_HOST_URL=https://sonarqube.jihw.top
或者:
SONAR_HOST_URL=http://sonarqube-sonarqube.sonarqube.svc.cluster.local:9000
创建 GitLab 项目
在 GitLab 里创建一个项目,例如:
qianduoduo-frontend
然后在本地项目目录执行:
cd D:\workspace\jihw\qianduoduo\frontend

git init
git remote add origin https://gitlab.jihw.top/root/qianduoduo-frontend.git
git add .
git commit -m "init frontend"
git branch -M main
git push -u origin main
如果这个目录已经是 Git 仓库,只需要确认 remote 指向 GitLab:
git remote -v
不要把 node_modules 推到 GitLab。建议 .gitignore 至少包含:
node_modules/
dist/
web_dist/
.sonar/
coverage/
配置免密推送
直接使用 HTTPS remote 时,第一次 git push 会要求输入 GitLab 账号和密码。GitLab 通常不建议直接用登录密码推代码,更推荐使用 Personal Access Token。
当前这套 GitLab 部署里,Web Ingress 已经可用:
https://gitlab.jihw.top
GitLab Shell 本身是集群内 ClusterIP:
gitlab-gitlab-shell.gitlab.svc.cluster.local:22
如果要从 Windows 本机使用 SSH 免密推送,需要额外把 22 端口暴露到集群外。当前已经通过 ingress-nginx 的 TCP 转发把 192.168.3.230:22 转发到了 GitLab Shell。
暴露命令如下:
helm repo add ingress-nginx https://kubernetes.github.io/ingress-nginx
helm repo update ingress-nginx

cat <<'EOF' | helm upgrade ingress-nginx ingress-nginx/ingress-nginx \
  -n ingress-nginx \
  --version 4.15.1 \
  -f - \
  --timeout 5m
controller:
  ingressClassResource:
    default: true
  containerPort:
    "22-tcp": 22
  service:
    type: LoadBalancer
    ports:
      "22-tcp": 22
    targetPorts:
      "22-tcp": "22-tcp"

tcp:
  "22": gitlab/gitlab-gitlab-shell:22
EOF
确认:
kubectl -n ingress-nginx get svc ingress-nginx-controller -o wide
kubectl -n ingress-nginx get cm ingress-nginx-tcp -o yaml
期望看到:
ingress-nginx-controller LoadBalancer ... 192.168.3.230 80:.../TCP,443:.../TCP,22:.../TCP
Windows 上测试:
Test-NetConnection gitlab.jihw.top -Port 22
ssh -T git@gitlab.jihw.top
如果 SSH key 已经添加到 GitLab,应该看到类似:
Welcome to GitLab, @root!
方案一:HTTPS + Token
不想暴露 SSH 端口时,也可以继续用:
HTTPS remote + Personal Access Token + Git Credential Manager 记住凭据
在 GitLab 创建 Token:
头像 -> Preferences -> Access Tokens
创建一个 Project 或 Personal Access Token,勾选:
read_repository
write_repository
如果还要通过 API 操作项目,可以额外勾选:
api
然后确认当前 remote 是 HTTPS:
cd D:\workspace\jihw\qianduoduo\frontend
git remote -v
如果不是,改成:
git remote set-url origin https://gitlab.jihw.top/root/qianduoduo-frontend.git
第一次推送:
git push -u origin main
提示输入时:
Username: GitLab 用户名,例如 root
Password: 粘贴刚生成的 Token,不是 GitLab 登录密码
Windows 上 Git for Windows 默认带 Git Credential Manager。第一次输入后,它会把凭据保存到 Windows 凭据管理器,后面再 git push 就不需要重复输入。
可以确认 credential helper:
git config --global credential.helper
如果没有配置,可以启用:
git config --global credential.helper manager
如果输错过 Token,可以到这里删除旧凭据:
控制面板 -> 凭据管理器 -> Windows 凭据
找到 git:https://gitlab.jihw.top 相关条目删除,然后重新 git push。
方案二:SSH Key
SSH key 是更传统的免密方式,前提是上面的 GitLab SSH 入口已经暴露给 Windows 本机访问。
先生成 SSH key:
ssh-keygen -t ed25519 -C "rx@gitlab.jihw.top"
查看公钥:
cat $env:USERPROFILE\.ssh\id_ed25519.pub
复制公钥,添加到 GitLab:
头像 -> Preferences -> SSH Keys
当前已经把 GitLab Shell 暴露为:
ssh://git@gitlab.jihw.top:22
就可以把 remote 改成 SSH:
git remote set-url origin git@gitlab.jihw.top:root/qianduoduo-frontend.git
测试:
ssh -T git@gitlab.jihw.top
git push
如果 SSH 端口不是 22,而是例如 2222,remote 要写成:
git remote set-url origin ssh://git@gitlab.jihw.top:2222/root/qianduoduo-frontend.git
如果没有额外暴露 GitLab Shell,直接配置 SSH key 仍然会连不上。这时先用 HTTPS + Token 更稳。
创建 SonarQube 项目
登录 SonarQube:
https://sonarqube.jihw.top
创建项目:
Projects -> Create Project -> Manually
示例:
Project display name: qianduoduo-frontend
Project key:          qianduoduo-frontend
Main branch:          main
创建完成后生成扫描 Token。注意不要去这个页面:
Administration -> Configuration -> Authentication -> GitLab
也就是类似这个地址:
https://sonarqube.jihw.top/admin/settings?category=authentication&tab=gitlab
那个页面是配置“使用 GitLab 账号登录 SonarQube”的,不是生成 CI 扫描 Token 的地方。
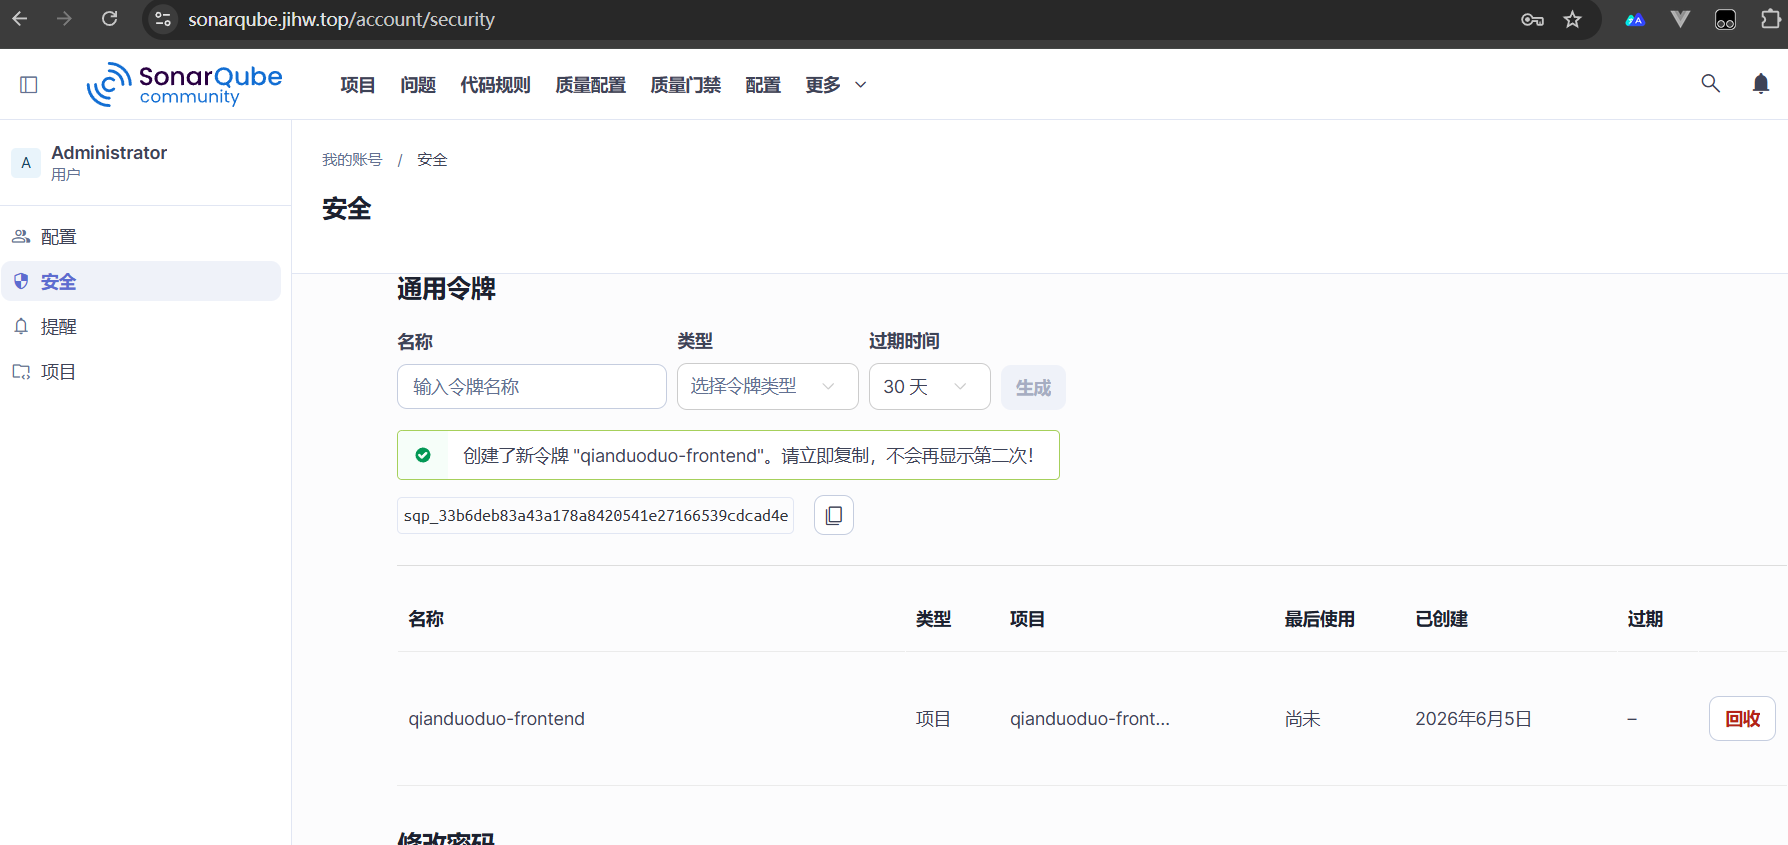
扫描 Token 通常在当前登录用户的账号设置里生成:
右上角头像 -> My Account -> Security -> Generate Tokens
Token 类型可以选择:
Project Analysis Token
Token 只显示一次,生成后马上复制。
配置 GitLab 变量
进入 GitLab 项目:
Project -> Settings -> CI/CD -> Variables

添加:
SONAR_HOST_URL = https://sonarqube.jihw.top
SONAR_TOKEN    = SonarQube 里生成的 Token
建议:
SONAR_TOKEN 勾选 Masked
SONAR_TOKEN 勾选 Protected 取决于分支策略
SONAR_HOST_URL 不需要 Masked
如果 Runner 在集群内,并且还没给 DNS 配 sonarqube.jihw.top,可以先用 Service 地址:
SONAR_HOST_URL = http://sonarqube-sonarqube.sonarqube.svc.cluster.local:9000
添加 sonar-project.properties
在 D:\workspace\jihw\qianduoduo\frontend 下创建:
sonar-project.properties
内容:
sonar.projectKey=qianduoduo-frontend
sonar.projectName=qianduoduo-frontend
sonar.sourceEncoding=UTF-8

sonar.sources=src
sonar.tests=

sonar.exclusions=node_modules/**,dist/**,web_dist/**,coverage/**,.sonar/**
sonar.javascript.lcov.reportPaths=coverage/lcov.info
当前项目还没有单元测试和覆盖率文件,所以 coverage/lcov.info 不存在也没关系。后面接入 Vitest 或其他测试框架后,再让 CI 生成覆盖率即可。
如果暂时不想配置覆盖率,也可以先删掉这一行:
sonar.javascript.lcov.reportPaths=coverage/lcov.info
添加 .gitlab-ci.yml
在项目根目录创建:
.gitlab-ci.yml
基础版本:
stages:
  - build
  - scan

build:
  stage: build
  image: node:22-alpine
  cache:
    key:
      files:
        - package-lock.json
    paths:
      - .npm/
  script:
    - npm ci --cache .npm --prefer-offline
    - npm run build
    - mkdir -p web_dist
    - cp -r ../web_dist/. web_dist/
  artifacts:
    when: always
    expire_in: 1 week
    paths:
      - web_dist/

sonarqube:
  stage: scan
  image:
    name: sonarsource/sonar-scanner-cli:latest
    entrypoint: [""]
  variables:
    SONAR_USER_HOME: "${CI_PROJECT_DIR}/.sonar"
    GIT_DEPTH: "0"
  cache:
    key: "${CI_JOB_NAME}"
    paths:
      - .sonar/cache
  script:
    - sonar-scanner
      -Dsonar.host.url="${SONAR_HOST_URL}"
      -Dsonar.token="${SONAR_TOKEN}"
  needs:
    - build
  allow_failure: false
这里分成两个 job:
build      先确认 Vite 项目能构建
sonarqube  再上传代码质量扫描结果
vite.config.js 里现在写的是:
build: {
  outDir: '../web_dist',
  emptyOutDir: true
}
所以 CI 产物路径写成:
script:
  - npm run build
  - mkdir -p web_dist
  - cp -r ../web_dist/. web_dist/

artifacts:
  paths:
    - web_dist/
如果以后把构建输出改回项目内的 dist,这里也要同步改成:
artifacts:
  paths:
    - dist/
推送并触发流水线
提交配置:
cd D:\workspace\jihw\qianduoduo\frontend

git add sonar-project.properties .gitlab-ci.yml .gitignore
git commit -m "ci: add sonarqube scan"
git push
在 GitLab 查看流水线:
Project -> Build -> Pipelines
正常情况会看到:
build      passed
sonarqube  passed
然后回到 SonarQube 项目页面,就能看到:
Bugs
Vulnerabilities
Security Hotspots
Code Smells
Duplications
Quality Gate
让质量门禁卡住流水线
如果希望 SonarQube Quality Gate 不通过时,GitLab pipeline 直接失败,可以加:
sonarqube:
  variables:
    SONAR_USER_HOME: "${CI_PROJECT_DIR}/.sonar"
    GIT_DEPTH: "0"
    SONAR_SCANNER_OPTS: "-Dsonar.qualitygate.wait=true"
或者直接在命令里写:
script:
  - sonar-scanner
    -Dsonar.host.url="${SONAR_HOST_URL}"
    -Dsonar.token="${SONAR_TOKEN}"
    -Dsonar.qualitygate.wait=true
这样扫描完成后,scanner 会等待 SonarQube 计算质量门禁结果。
如果 Quality Gate 是 Failed,GitLab job 也会失败。
合并请求里的用法
对于日常开发,更推荐只在 merge request 和 main 分支扫描:
sonarqube:
  stage: scan
  image:
    name: sonarsource/sonar-scanner-cli:latest
    entrypoint: [""]
  variables:
    SONAR_USER_HOME: "${CI_PROJECT_DIR}/.sonar"
    GIT_DEPTH: "0"
  script:
    - sonar-scanner
      -Dsonar.host.url="${SONAR_HOST_URL}"
      -Dsonar.token="${SONAR_TOKEN}"
      -Dsonar.qualitygate.wait=true
  rules:
    - if: '$CI_PIPELINE_SOURCE == "merge_request_event"'
    - if: '$CI_COMMIT_BRANCH == "main"'
这样可以避免每个临时分支都频繁扫描。
常见问题
流水线一直 running 或 pending
先看 Runner 是否在线:
Project -> Settings -> CI/CD -> Runners
如果 Runner 在线,但 job 仍然一直 pending,优先检查标签是否匹配。
这次遇到的问题是:Runner 标签是 qianduoduo-frontend,并且 run_untagged=false;但是 pipeline 里的 job 没有写 tags,所以 GitLab 不会把 job 分配给这个 Runner。
修复方式二选一:
1. 在 Runner 设置里打开 Run untagged jobs
2. 或者在 .gitlab-ci.yml 的每个 job 里添加 tags: [qianduoduo-frontend]
如果 job 已经被 Runner 接走,但很快失败,继续看 Runner 日志:
kubectl -n gitlab logs deploy/gitlab-runner --tail=200
如果看到下面的权限错误:
secrets is forbidden:
User "system:serviceaccount:gitlab:default" cannot create resource "secrets"
说明 Kubernetes Runner 缺少 RBAC 权限。用 Helm 打开 RBAC:
helm upgrade gitlab-runner gitlab/gitlab-runner \
  -n gitlab \
  --reuse-values \
  --set rbac.create=true
等待 Runner 重启:
kubectl -n gitlab rollout status deploy/gitlab-runner
然后回到 GitLab 页面重试失败的 job 或 pipeline。修复后,build 和 sonarqube job 应该都会被 Runner 接走并执行。
Runner 无法连接 SonarQube
先在 Runner job 里临时加:
script:
  - curl -I "${SONAR_HOST_URL}"
  - sonar-scanner ...
如果域名不通,优先确认:
sonarqube.jihw.top 是否解析到 192.168.3.230
Runner Pod 是否能访问 ingress-nginx
是否需要改用 Kubernetes Service 地址
集群内 Service 地址一般更稳:
http://sonarqube-sonarqube.sonarqube.svc.cluster.local:9000
Token 错误
如果日志里有:
Not authorized
You're not authorized to analyze this project
检查:
SONAR_TOKEN 是否复制完整
Token 是否属于有项目分析权限的用户
sonar.projectKey 是否和 SonarQube 项目一致
node_modules 被扫描
确认 sonar-project.properties 里排除了:
sonar.exclusions=node_modules/**,dist/**,web_dist/**,coverage/**,.sonar/**
构建成功但扫描失败
分开看两个 job:
build 失败      先修 npm ci / npm run build
sonarqube 失败  再看 SonarQube 地址、Token、projectKey
不要把构建和扫描混在一个 job 里排查。分开以后,问题会清楚很多。
最小检查清单
GitLab 项目已经有 frontend 代码
GitLab Runner 在线
Runner 标签和 .gitlab-ci.yml 的 tags 匹配,或 Runner 允许 untagged job
Kubernetes Runner 已开启 RBAC
SonarQube 项目 key 是 qianduoduo-frontend
GitLab Variables 已配置 SONAR_HOST_URL 和 SONAR_TOKEN
项目根目录有 sonar-project.properties
项目根目录有 .gitlab-ci.yml
流水线 build 通过
流水线 sonarqube 通过
SonarQube 页面能看到扫描结果
到这里,GitLab 和 SonarQube 就串起来了。后面可以继续补单元测试和覆盖率,让质量门禁从“能扫”升级到“能拦住低质量代码”。